
Special Application Elevators
Mine Elevators
Return to elevatorbob's Elevator Pictures
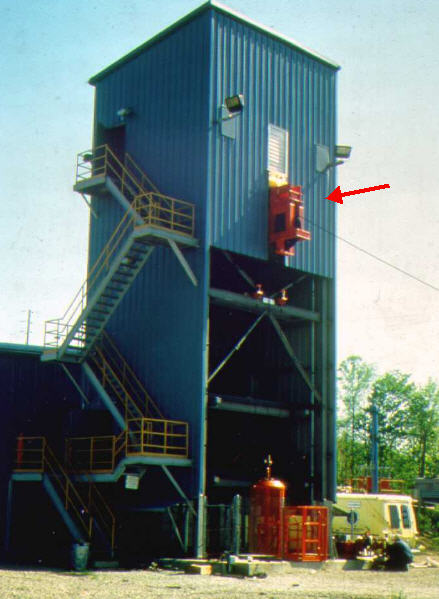
Image 1
Elevator machine room...
The red arrow is pointing to a head sheave for an emergency escape facility
that is located in the same shaft as the mine elevator.
Image provided by: Jerry Taylor
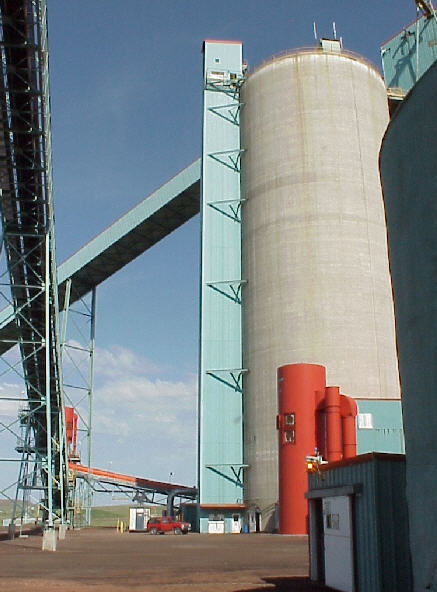
Image 2
Coal silo elevator...
Image provided by: Jerry Taylor
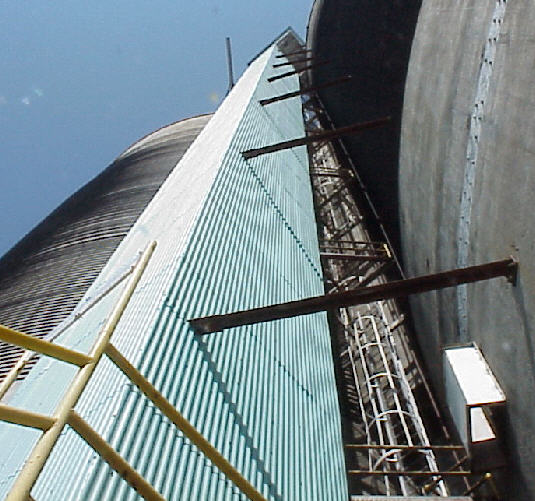
Image 3
Coal silo elevator machine room emergency access...
Also provides access to the hoistway at several points.
Image provided by: Jerry Taylor
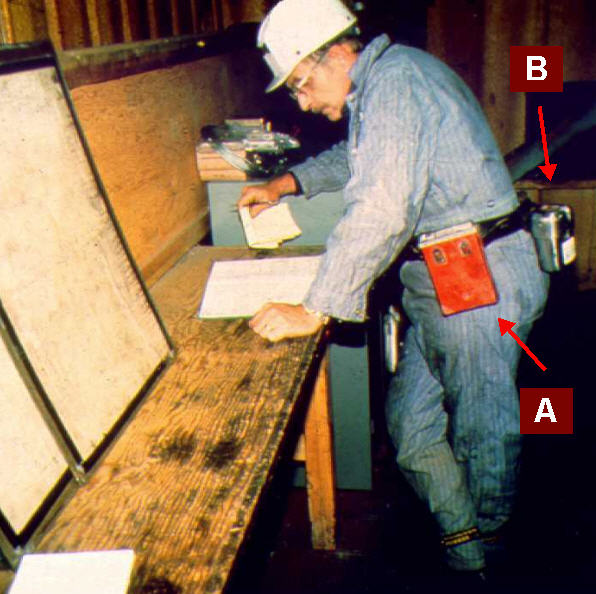
Image 4
Coal Mine Inspection Supervisor Mr. Cupp checking the prints...
Device A is the battery for his cap lamp and
device B is his "filter type" self-rescuer (respirator).
Image provided by: Jerry Taylor
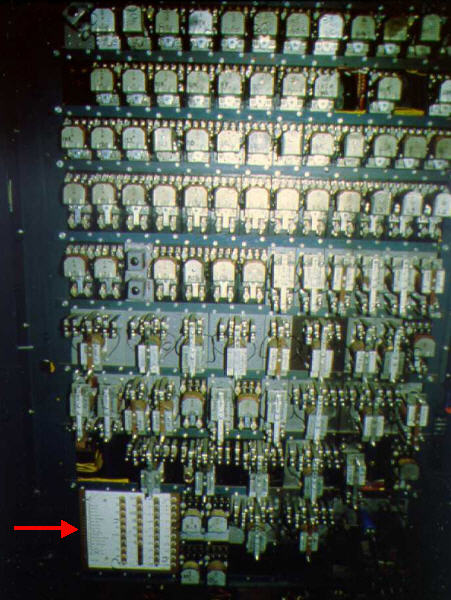
Image 5
A controller - the red arrow is pointing to an annunciator.
Image provided by: Jerry Taylor

Image 6
The annunciator assists the technician in troubleshooting the elevator and directing other
mechanics in the mine to the source of the problem if he can not access the area.
Image provided by: Jerry Taylor
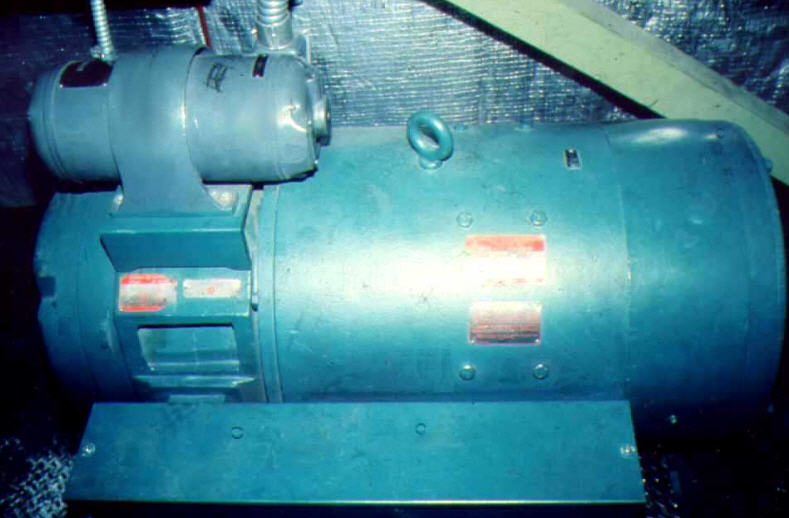
Image 7
A motor-generator set...I wonder if that is an exciter above the motor?
Image provided by: Jerry Taylor
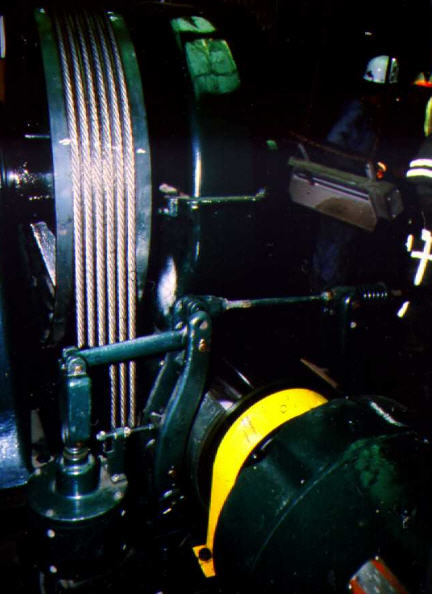
Image 8
A geared machine...
Image provided by: Jerry Taylor
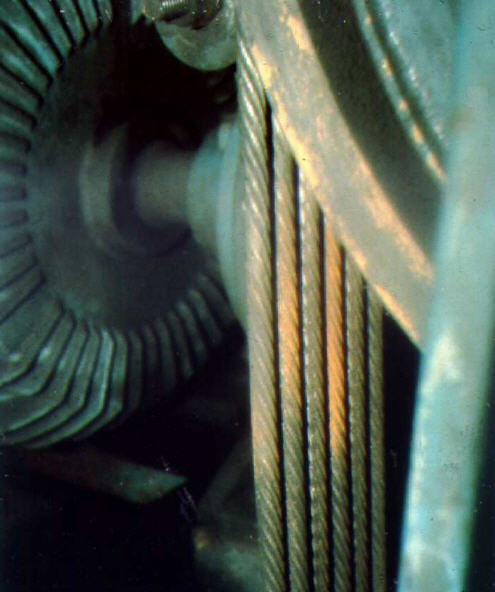
Image 9
Suspension rope damage...
Jerry Taylor - "This is a classic example of rusty spots on suspension ropes that run in a harsh
environment, such as: mine elevators, plant elevators, outdoor elevators, etc. The rusty spots on
these ropes are usually caused by water dripping down the shaft and splashing onto the ropes at a
specific location. A contributing factor is poor or no field lubrication. The corrosion may be mere
surface rust, that can be wire-brushed off, or it may penetrate the rope to core level and begin
deteriorating the rope from the inside out."
Image provided by: Jerry Taylor
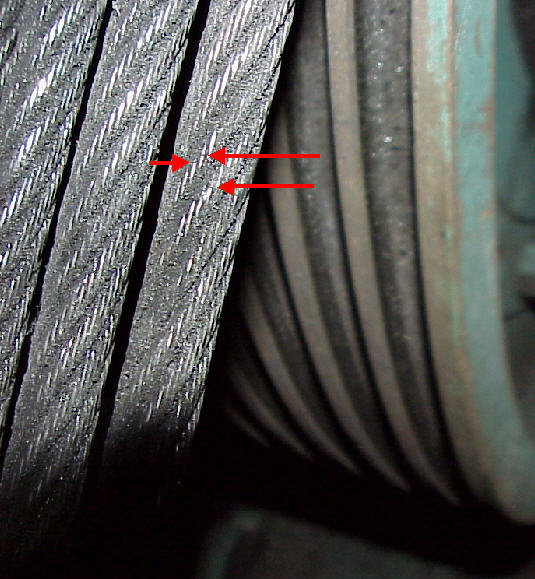
Image 10
The red arrows point to broken crown wires.
Jerry originally took the photo "to show the build-up in the traction sheave V-grooves
that could progress to the point of lifting the ropes sufficiently to break traction."
Image provided by: Jerry Taylor
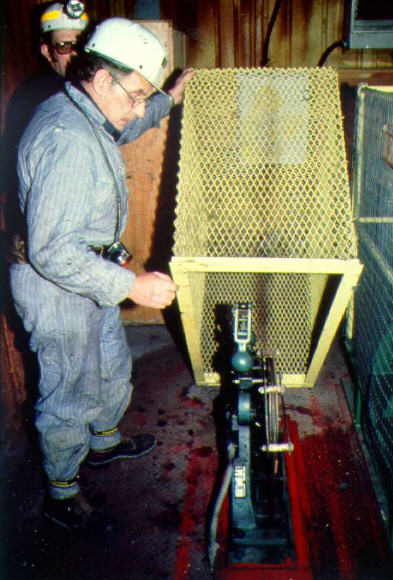
Image 11
A flyball governor and guard...
Image provided by: Jerry Taylor

Image 12
Horizontal shaft governor...
Image provided by: Jerry Taylor
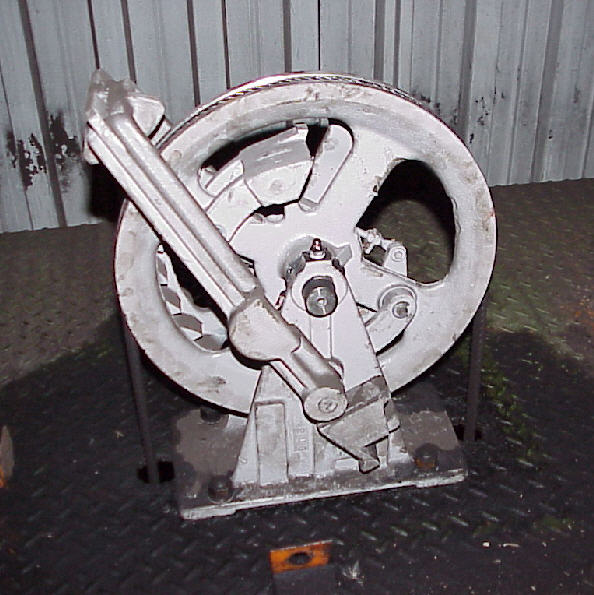
Image 13
This governor is used on a 100 FPM car.
As you can see it does not have a governor switch,
previously allowed for car speeds of 150 FPM or less.
The current A17.1 code (2007) requires a governor switch for any car speed.
Image provided by: Jerry Taylor
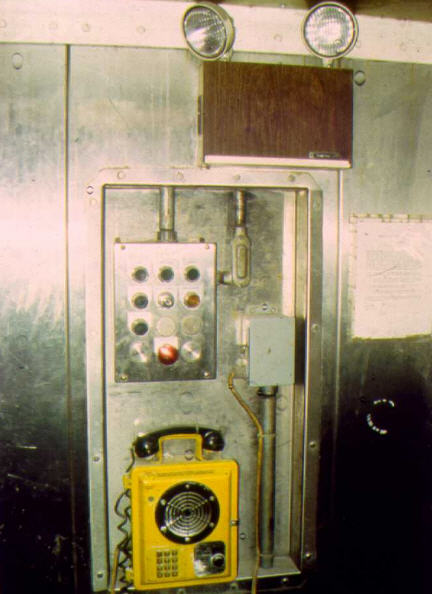
Image 14
A car operating panel...
Image provided by: Jerry Taylor
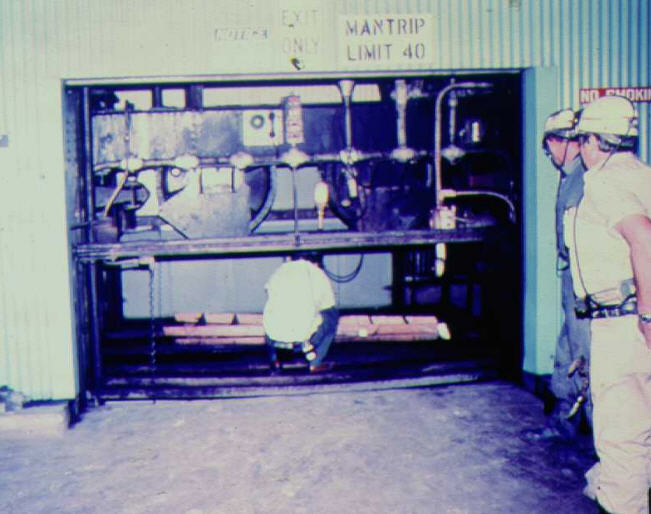
Image 15
Note the car top communication device...
Image provided by: Jerry Taylor
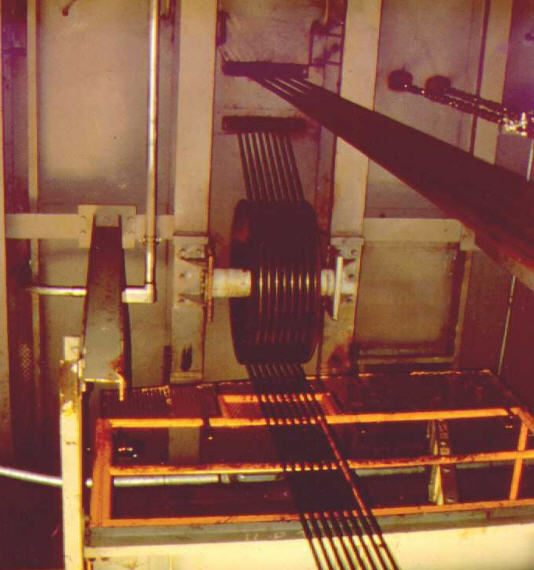
Image 16
Deflector/double-wrap sheave and work platform...
Image provided by: Jerry Taylor
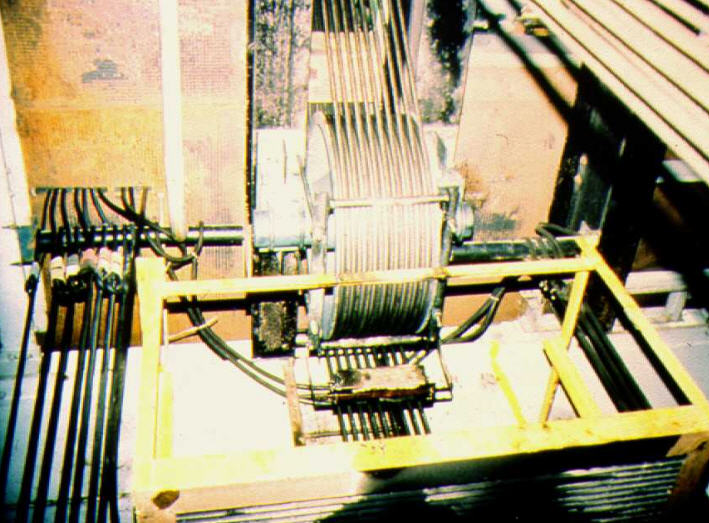
Image 17
Deflector/double-wrap sheave and work platform...
Image provided by: Jerry Taylor
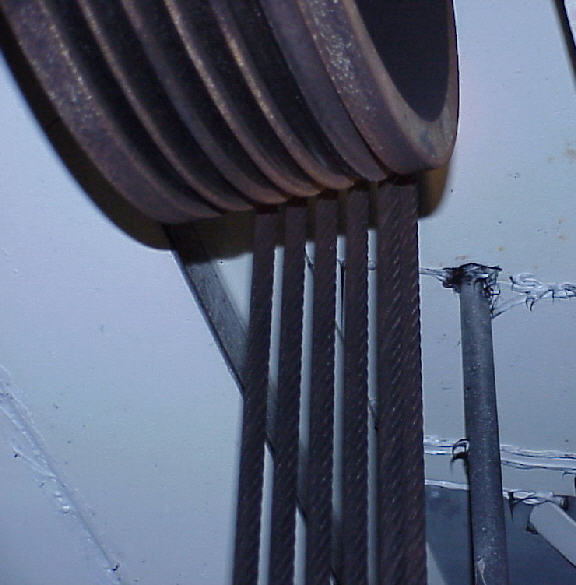
Image 18
Damaged deflector sheave...
An inspection in June revealed this condition. The #6 rope had jumped out of its groove,
only on the deflector, and was riding on top of the #5 rope and the flange between grooves 5 & 6.
This occurred (speculatively) when the counterweight came down and slammed into an ice build-up
the previous February. There was no observable damage to any component.
Image provided by: Jerry Taylor
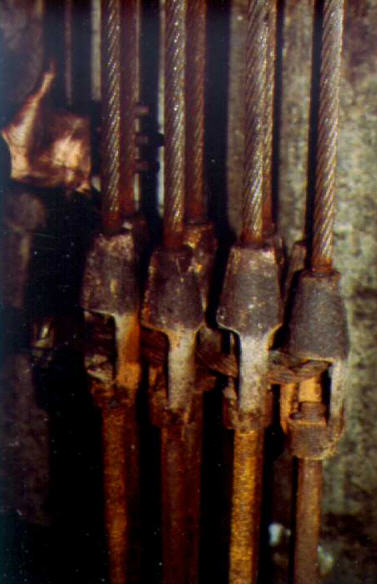
Image 19
Corroded and rusted tapered rope sockets...
The sockets would be condemned but the ropes could remain in service
if this is the only damaged area and if shortening the ropes did not
present a clearance problem for the counterweight.
Image provided by: Jerry Taylor
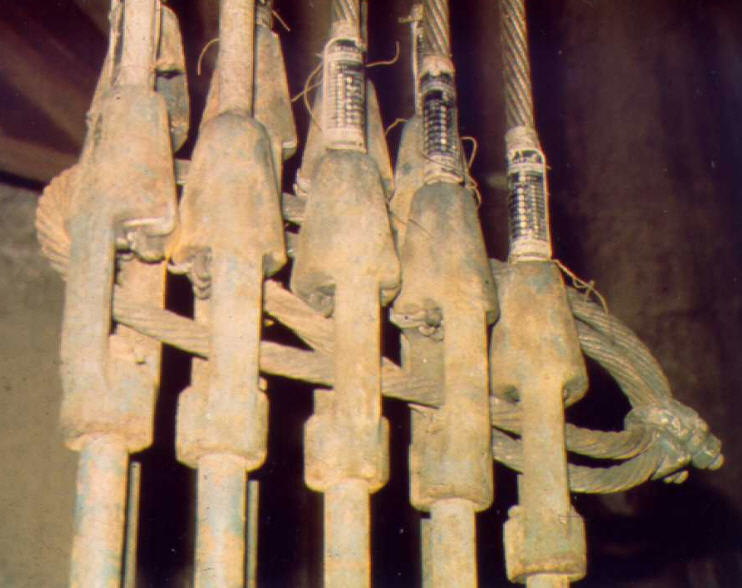
Image 20
In the old days each spool of rope had a data tag so...each of these ropes has one.
Some of the turned-back strand loops might be projecting out of the embedment material
more than permitted (see the following diagram). I have found that most inspectors
will not condemn such work unless they find another problem with the end termination, etc.
Image provided by: Jerry Taylor
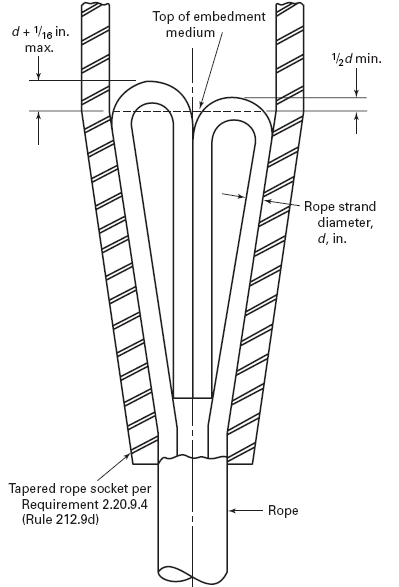
Image 20A
Cross-section through a tapered rope socket showing maximum & minimum
projection of turned-back strand loops above embedment medium.
Image provided by:
American Society Of Mechanical Engineers - A17.3 - 2005 Safety Code for Existing Elevators and Escalators
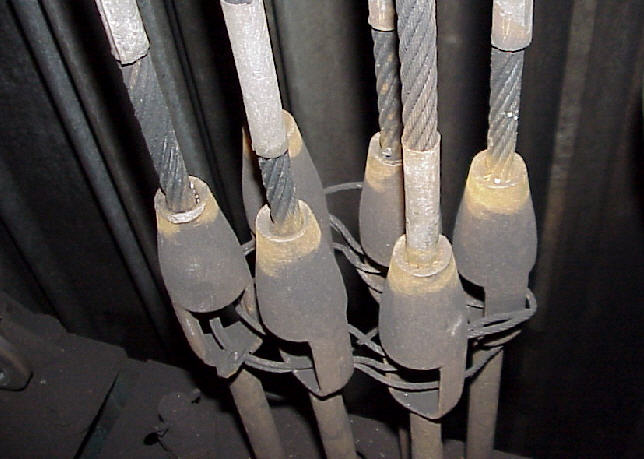
Image 21
These ropes would be condemned unless this was the only damaged area and if
shortening the ropes did not present a clearance problem for the counterweight.
All of the areas under the seizing bands are corroded and the wires are pitted.
Image provided by: Jerry Taylor
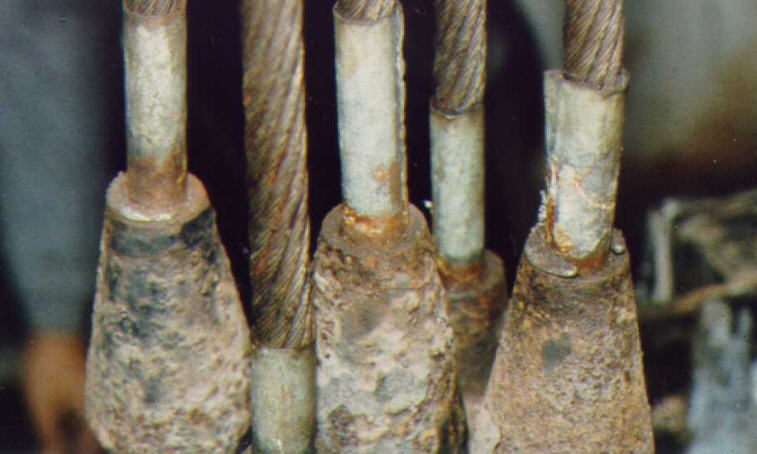
Image 22
Should we inspect under these cable bands?
Image provided by: Jerry Taylor
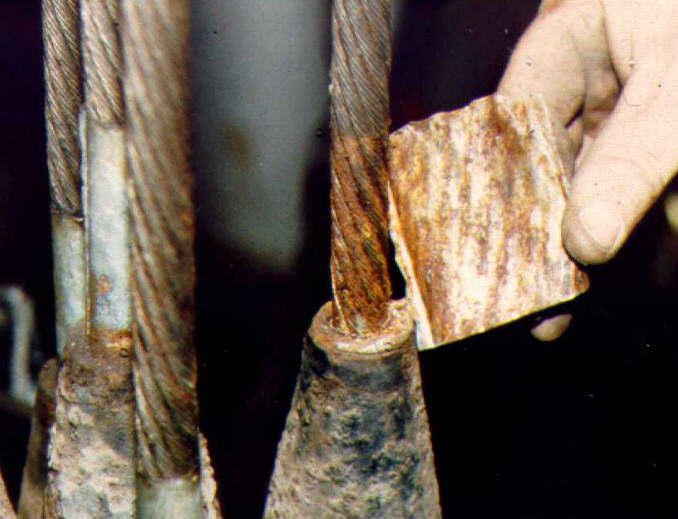
Image 23
Yes...damaged suspension ropes!
Jerry Taylor - "I insist that ALL seizing - on ALL ropes - be immediately removed upon rope installation, and
that a bead of soft grease be placed around the area where ropes enter sockets. Future inspections can be
accomplished by wiping grease, examining, and replacing grease (to keep contaminants out). Seizings trap and
hide the "nasties" in harsh environments."
Image provided by: Jerry Taylor
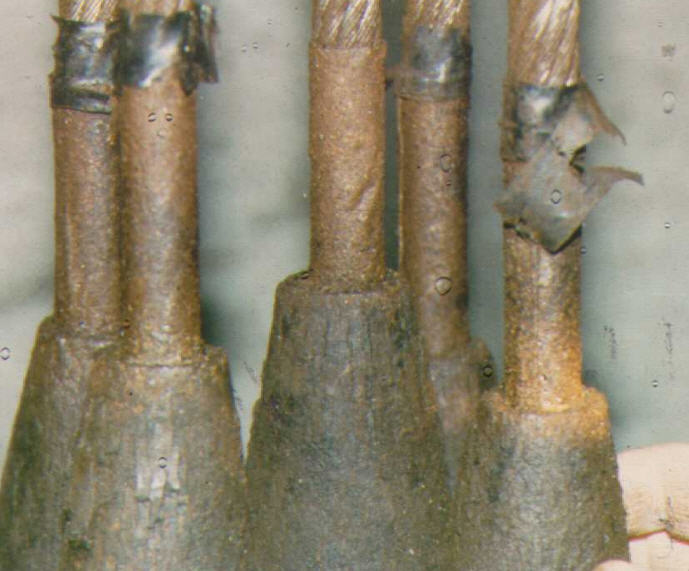
Image 24
Damaged and corroded ropes entering tapered sockets...
The sockets might be condemned but the ropes could remain in service
if this is the only damaged area and if shortening the ropes did not
present a clearance problem for the counterweight.
Image provided by: Jerry Taylor
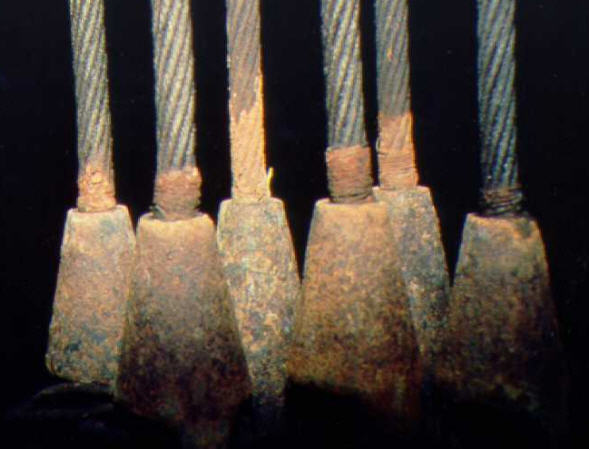
Image 25
The sockets would be condemned but the ropes could remain in service
if this is the only damaged area and if shortening the ropes did not
present a clearance problem for the counterweight.
Image provided by: Jerry Taylor
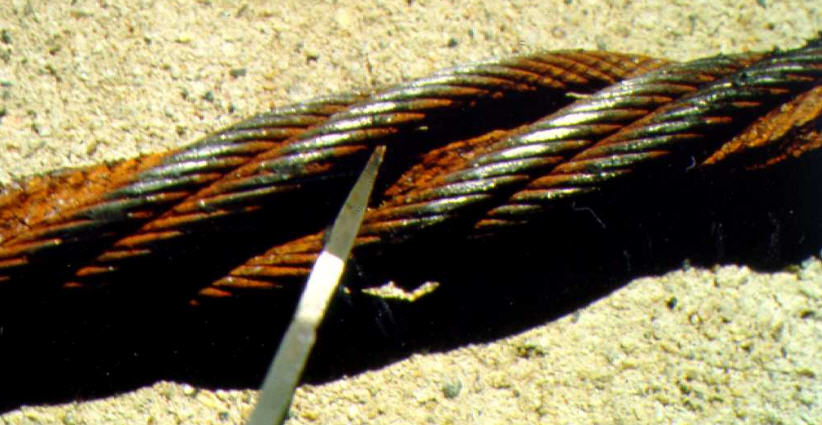
Image 26
Damaged and corroded rope...
Jerry Taylor - "We are looking at rust and fretting of the rust - pure corrosion.
Rouging (see Image 28) is fretting of metal from bright wires due to insufficient or no field lubrication.
The rouge is oxidation of the bright, microscopic, metal particles exuding from within the rope."
Image provided by: Jerry Taylor
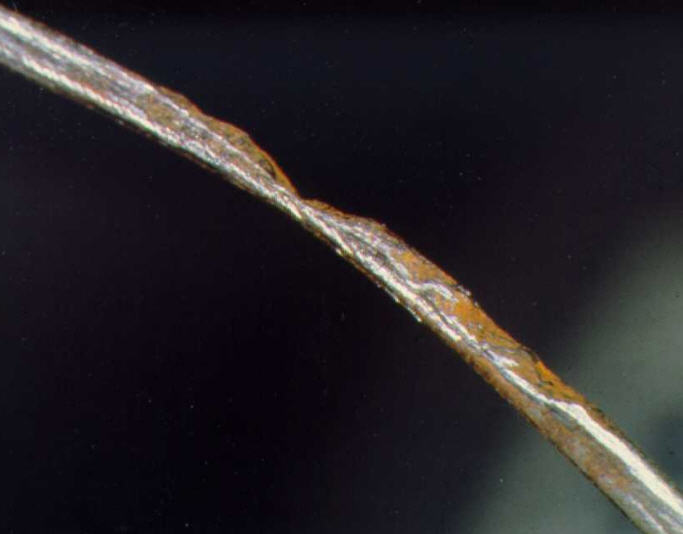
Image 27
This wire was removed from a condemned set of ropes.
One rope was taken for an "autopsy" by MSHA's Technical Support group.
(United States Department of Labor - Mine Safety and Health Administration)
Image provided by: Jerry Taylor
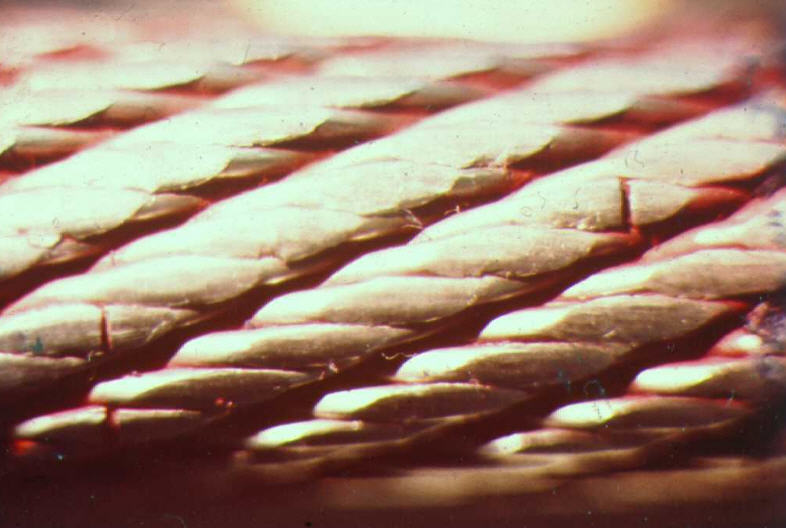
Image 28
This photo also shows a classic example of rouging. Note that there is no corrosion and
that the wires are bright. The red dust between the strands is rouge. Note the broken wires.
Image provided by: Jerry Taylor
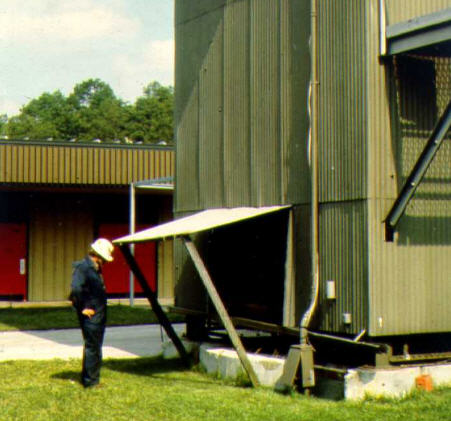
Image 29
A mine elevator head house installed over an intake (air) shaft...
Image provided by: Jerry Taylor
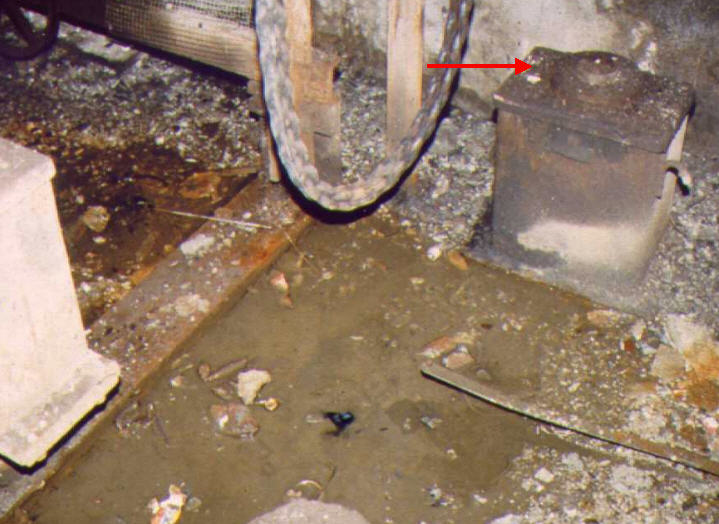
Image 30
A compressed counterweight buffer...
The present A17.1-2007 requires all mine elevator oil buffers to be provided
with a buffer switch. (See 5.9.22(b)) On conventional elevators, only gas
spring return oil buffers are required to have a buffer switch. (See 2.22.4.5(c))
Image provided by: Jerry Taylor
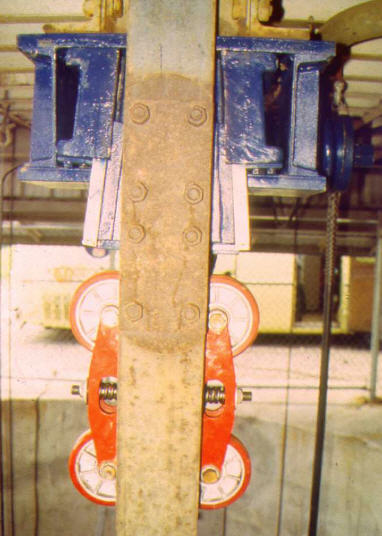
Image 31
A wedge-operated flexible guide-clamp safety device...
Image provided by: Jerry Taylor
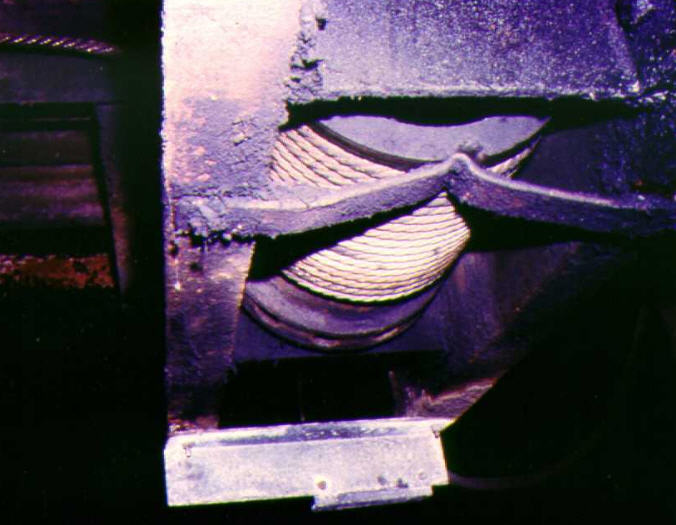
Image 32
The safety drum and rope for a wedge-clamp safety device...
Image provided by: Jerry Taylor
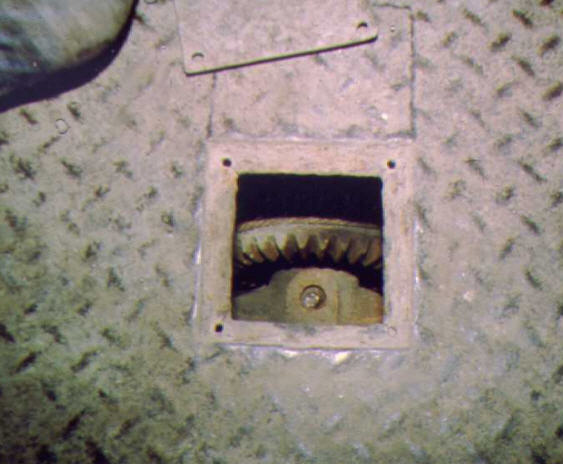
Image 33
Hole in the car floor for the safety releasing wrench...
Image provided by: Jerry Taylor
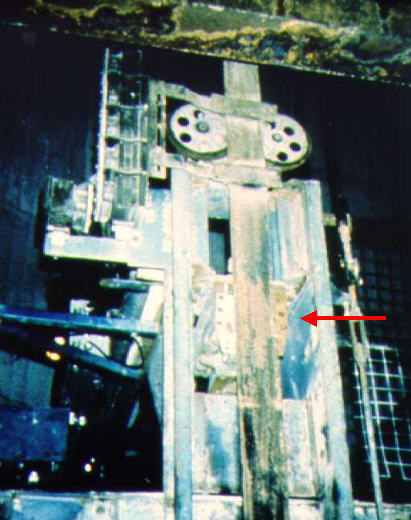
Image 34
The upper half of a duplex safety device...
Image provided by: Jerry Taylor
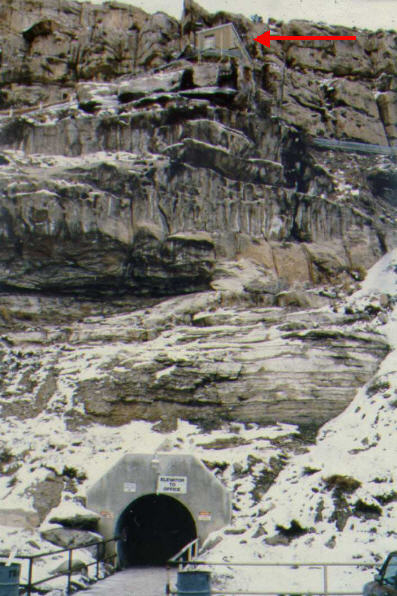
Image 35
Classic definition of a remote machine room...
If you don't behave...you get this job on your service route!
Image provided by: Jerry Taylor

Image 36
See what happens when you don't stop at the bottom landing?
Image provided by: Jerry Taylor
![]()
![]()
![]()
 E-mail me a link, image, suggestion, or comment!
Bob Desnoyers Elevator & Escalator Inspections, Inc.
Vertical Transportation Consultants & Inspectors
Vertical Transportation Authorities Having Jurisdiction
State of California - Conveyance - Authority Having Jurisdiction Site Map
Return to elevatorbob's Elevator Pictures
Advertise on One Stop Elevator
